The week has been full of productivity and learning!
Mike and I began the week by attending our first (of five) childbirth and baby classes. The classes are conducted by our care provider and held for two hours each Monday night. I think that Mike believes I am torturing him by making him go, but we both did learn some facts the first night. Plus, it was fun to gather with about ten other couples to talk baby shop, most of whom are first-timers like us. The class is taught by a registered nurse and covers many basics from the anatomy of a pregnant woman to postpartum care for mom and baby. This past week we spent time doing ice breakers, talking pregnancy body changes and watching a short film of a woman delivering a baby. Both Mike and I concluded that the placenta looks more like The Blob than we expected.
I attended my first prenatal yoga class this week, which was interesting. I have taken a couple yoga classes, but never a prenatal one. I believe the class will be beneficial in terms of learning breathing and relaxation techniques. Although, I'm not sure how great of a student I am. At the end of the class, each of us got into a "relaxing" position in which we were supposed to just let our minds relax and kind of "center" ourselves. We did this for about 12-15 minutes. About five minutes in I was wondering how much longer I had to lie there and if it would be weird of me to start packing up my stuff. I guess I still have much to learn!
Mike and I are still laying down hardwood floors in our house. Our project is about halfway done; the whole upstairs is complete and we began the main (and final) level this week. When it's the two of us, I help by picking out and laying down the boards while he goes behind me with the stapler or nail gun. This weekend I learned how to operate the chop saw which was pretty exciting. It was kind of intimidating, but I learned that it's actually a safer saw to use (compared to some others). This week the two of us laid down the floors in our dining room and are creeping into the living room domain with the boards now.
On Saturday, Mike shot and killed a buck with his bow for the first time. That was very exciting!! He's been bow hunting for years, but has never gotten one until this weekend. So, needless to say we celebrated with some venison filets for dinner that night! Tonight he showed me how to butcher the deer, so we've spent the majority of our evening slicing, grinding and packing venison for our freezer. It's a lot of work, but very worth it to have fresh, organic meat that's free. Sure beats spending money at the grocery store for a similar-in-quality product.
This afternoon after church we spent a couple hours in the yard, which had been seriously ignored since the beginning of our flooring project. Mike mowed the grass and trimmed the bushes. I picked up the trimmings and collected the ripe Thai chilies off our seven plants. I think there were hundreds of them. Mike dries and grinds them so we can put them in shakers for use through the year.
In terms of my pregnancy, I've competed 33 weeks and launched into week 34 two days ago. It's hard to believe that we are less than seven weeks from the ideal full term time of 40 weeks. Considering babies are called "full term" at week 38, we are almost just a month away from that. Kind of crazy!! I am beginning to feel more of the not-so-fun feelings of the third trimester. It doesn't take much for my back to be sore (just standing too long these days seems to do it) and I have given up any hope of sleeping comfortably on my back. I'm now just a side-sleeper and even then I have to change sides at least twice an hour. Poor Mike... I don't think he's sleeping as good these days either just because I'm moving so much in the night. I get short-winded pretty easily and am generally feeling like this baby is not a good sharer anymore. We are each fighting for space in my mid section and baby (as small as s/he is) seems to be winning. Dolp! Still, I'm thankful for every moment of this journey.
Showing posts with label Projects. Show all posts
Showing posts with label Projects. Show all posts
Sunday, September 15, 2013


Saturday, August 24, 2013
Our Newest Project
It's been a weekend here. The weather was beautiful outside, but we fixed our attention indoors and on our floors.


 Yay! Board number one has been laid! The planning process to laying it took about 1.5 hours, but it was laid perfectly straight!. Doesn't Tempe look so smart in the middle if all those tools?

 Some action shots that show the progress of the floor and the painted walls behind them.
 The floors are finished! Now just the last touches to go: baseboards, quarter rounds and final paint touch-ups!
We began the tedious task of updating our carpeted rooms. We have just shy of 1500 square feet ahead of us, with six large rooms and their closets.
Thankfully, Mike and I are blessed with such a gracious family that is willing to lend hands (backs, knees, arms...) and help us with this project. Mike's dad and our bro-in-law came over to help with labor and knowledge, which made a world of difference had Mike and I attempted this job by ourselves. The guys measured, positioned and nailed the beams of oak down while I painted walls and made sure they were fed and hydrated. We made a great team.
You can see in the pictures below the progress we've completed. The first picture is from the night the wood was delivered. Mike busted it out and laid some beams in our living room to get a preview. He was so excited- it was cute. ;)
All other pictures are taken in the room we have started on first. We call it our art room since we do our painting in there.
A picture of Tempe in the room before Mike tore out the carpet and I started painting the walls..
The carpet is gone and Tempe is supervising the guys as they discuss how to lay the starting board.
Saturday, October 27, 2012
What Painting with a Man and Two Cats Looks Like
We have the luxury of having a "bonus" room in our house into which many items make their way. There is organized chaos in the various forms of: wrapping paper and gift bags, piles of books waiting for a shelf, archived files, unused instruments, fishing poles and memories from yesteryear. Around the organized chaos are more organized areas where there is an office on one side of the room and art studio on the other.
Many nights Mike and I go to the "studio" to paint. He sits at a table in one corner and I stand beside him at my fancy desk/easel that Mike and his dad made for me. We listen to whatever music blares from the iPod or computer and spend (sometimes) hours in our own paintings, resurfacing from time to time to converse, critique and offer suggestions to one another. I love it.
It was this week that I busted out my old (and new) oils and paints. I hadn't used any of the media since my senior year of high school. It was a little intimidating at first. And to be honest, at this point, I couldn't tell you the differences between the specific oils. I know each one has a different drying time and gloss, but those are to be relearned.
The girls, Charlotte and Pearl, usually join us so we're one happy family in the bonus room. The girls spend their time napping, scratching and preening themselves. Mike and I create new memories that are sealed within the colors on our canvases.
Many nights Mike and I go to the "studio" to paint. He sits at a table in one corner and I stand beside him at my fancy desk/easel that Mike and his dad made for me. We listen to whatever music blares from the iPod or computer and spend (sometimes) hours in our own paintings, resurfacing from time to time to converse, critique and offer suggestions to one another. I love it.
It was this week that I busted out my old (and new) oils and paints. I hadn't used any of the media since my senior year of high school. It was a little intimidating at first. And to be honest, at this point, I couldn't tell you the differences between the specific oils. I know each one has a different drying time and gloss, but those are to be relearned.
The girls, Charlotte and Pearl, usually join us so we're one happy family in the bonus room. The girls spend their time napping, scratching and preening themselves. Mike and I create new memories that are sealed within the colors on our canvases.
 |
| Sleepy Pearl with Mike behind her at his table. |
 |
| Charlotte observing from under the desk. |
 |
| Mike working on creating a coyote with ink, watercolors and acrylics. |
 |
| A picture of manatees I just finished using acrylics. |
 |
| Passed out Pearl. |
 |
| My next endeavor... the picture above is its inspiration. |
 |
| Night one: a fine, basic layer of paints and a paint thinner. |
 | |||||||
| Night two: adding the oils. The bottom half of the picture and part of the fence is with oil and paints. |
 |
| Night three: adding more background and making the man shorter. |
Sunday, July 01, 2012
DIY2 and Nesting
Mike and I have spent the better part of this weekend indoors due to the 100+ degree weather that smacks either of us in the face when we walk outside. Turns out that hot weather is great motivation for doing projects in the house! We've knocked out several wedding projects, began others and also completed the huge "nesting" project of reorganizing the master closet to make room for my clothes.
On Friday afternoon I got to focus on a DIY project that was more my speed which involved paint and a canvas! Mike and I decided to have a wedding guest tree instead of a wedding guest book that everyone signs (and no one looks at after the wedding). These come in a variety of different types, but we decided that we'd paint ours and have our guests use ink to leave a thumbprint and signature (like this one).
Friday night we picked out a tree shape that we liked from some images online. Mike sweetly set up my painting station, laying out the paints, water and my paint palette near the beautiful, new easel he and his dad MADE for me. After the setup was complete, I went to town painting the guest tree.

Meanwhile, Mike worked on making wire hangers in which to hang candles that will go on our centerpieces. Oh, and he also entertained Charlotte who was supervising both of us and playing with his wire pieces.

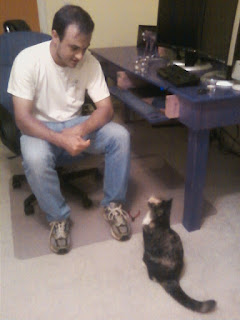
 We spent the better part of the evening on our various projects. I focused on the tree. Mike helped by giving input on it and by meticulously wrapping wire in the shape of candle cradles. Charlotte just played and slept. A couple hours later, and just shy of midnight, we wrapped for the night. The tree is done and a good portion of the wire candle cradles are done as well. Here are a couple pictures of the guest tree although the lighting and quality are poor cuz of my camera phone. The first one has truer color quality, but the second gives you a closer look.

 On Saturday the heat was just as terrible so we set about crossing another "to do" off the list: reorganizing and installing shelving into the master closet. The closet, which is pretty large (6'x5'). already had some shelving in it which was a good start. However, when Mike and I started talking about moving my clothes in we realized that the space could be better utilized if different shelving was in there.
Well, you know how projects go... they are never as quick as one first estimates. When we looked closer we decided that not only did it need new shelves, but it also needed a fresh face. So, we bought some paint and shelving material and got to work. About five hours later, the closet was scar-free and sporting fresh walls. It also was stripped of the old shelves and new ones went in place of them. I'm so pleased! There is little shelving for towels, sweaters, etc. Medium shelving for shirts and pants. There is even the perfect height shelving for all the dresses I own. It feels good to accomplish that project and get some nesting details situated now so that we won't be staring at them immediately post-wedding.
Today is also hot, providing me a great day to post this and relax a bit. Mike is working on piecing together some fishing rods and reels. Charlotte and Pearl (our other kitty) are sleeping on the couch where he's working and at his feet.
I also just finished putting some touches on our cake toppers. They are a little different than the average wedding cake topper. There is no bride in her white dress standing beside a dapper groom. Rather, the tiger and cow figurines were won with ski-ball tickets that Mike and I won on our first road trip to Myrtle Beach that we took in Round 2 of dating. The plastic, bendy animals have been sitting in Mike's living room and waiting for such a purpose as topping a wedding cake. I found a little top hat and cut a (much) smaller version of a veil to glue on their heads. The result... a cow and tiger ready to be married! Mike claims that the crystal candle holder they are in is their hot tub. What do you think?

On Friday afternoon I got to focus on a DIY project that was more my speed which involved paint and a canvas! Mike and I decided to have a wedding guest tree instead of a wedding guest book that everyone signs (and no one looks at after the wedding). These come in a variety of different types, but we decided that we'd paint ours and have our guests use ink to leave a thumbprint and signature (like this one).

Friday night we picked out a tree shape that we liked from some images online. Mike sweetly set up my painting station, laying out the paints, water and my paint palette near the beautiful, new easel he and his dad MADE for me. After the setup was complete, I went to town painting the guest tree.

Meanwhile, Mike worked on making wire hangers in which to hang candles that will go on our centerpieces. Oh, and he also entertained Charlotte who was supervising both of us and playing with his wire pieces.


Well, you know how projects go... they are never as quick as one first estimates. When we looked closer we decided that not only did it need new shelves, but it also needed a fresh face. So, we bought some paint and shelving material and got to work. About five hours later, the closet was scar-free and sporting fresh walls. It also was stripped of the old shelves and new ones went in place of them. I'm so pleased! There is little shelving for towels, sweaters, etc. Medium shelving for shirts and pants. There is even the perfect height shelving for all the dresses I own. It feels good to accomplish that project and get some nesting details situated now so that we won't be staring at them immediately post-wedding.
Today is also hot, providing me a great day to post this and relax a bit. Mike is working on piecing together some fishing rods and reels. Charlotte and Pearl (our other kitty) are sleeping on the couch where he's working and at his feet.
I also just finished putting some touches on our cake toppers. They are a little different than the average wedding cake topper. There is no bride in her white dress standing beside a dapper groom. Rather, the tiger and cow figurines were won with ski-ball tickets that Mike and I won on our first road trip to Myrtle Beach that we took in Round 2 of dating. The plastic, bendy animals have been sitting in Mike's living room and waiting for such a purpose as topping a wedding cake. I found a little top hat and cut a (much) smaller version of a veil to glue on their heads. The result... a cow and tiger ready to be married! Mike claims that the crystal candle holder they are in is their hot tub. What do you think?

Wednesday, June 27, 2012
A Bridal Rant about DIY Projects
I didn't think my first post back after a brief hiatus would be about bridal projects, but that's a big chunk of my world right now.
Questions are always swimming in my head: What do I need to follow up on? To whom do I owe a call or email? What appointment is next? Where's the receipt for that? Do I owe anyone money, my signature or my first child? Who still hasn't RSVP'ed?
I'll be the first to admit that thus far the planning hasn't been that stressful. God has been either a) Merciful or b) Equipped me with the attitude that "eh.. it'll fall into place". Perhaps it's a little bit of both.
I've definitely learned to pick my battles and also prioritize. One area those necessary skills come into play is regarding those lovely "Do It Yourself" aka DIY projects. I think anyone who has planned an event has run into his/her fair share of DIY projects, but what I've found with weddings is that DIY projects can save you HUGE bucks. What is it about the wedding industry that the moment you say you're going to need something for a wedding dollar signs start lighting up in neon and alarms go off? Also, prices automatically jump 25-50% of what they would be for the same piece of paper NOT featured in a wedding. Thats all to say that some projects made from scratch can really save some cash.
Mike and I have already done some DIY projects together (and look, folks, we survived and are still getting married!). When it came to our invitations we decided to design them ourselves and get them printed at Kinkos. It saved us about $100-150 going that route. Also, we're designing and assembling our own centerpieces and ceremony programs. These projects aren't yet done, so here's hoping we're still having a wedding in three weeks.
DIY projects are a fantastic way to save money, but I also learned last night that one should always listen to that little voice that says, "hey, you've got some skills, but maybe you should outsource this one." Cuz that voice wasn't talking to me anymore at 12:30 this morning. It was just laughing at me.
Mom and I decided that we would create my fascinator and also use her existing, super long and plain veil to make a shorter, more embellished veil. The average store-bought fascinator runs about $75-$200. Veils start at about $50 and can run you into bankruptcy. Our thinking was that I could save minimally anywhere from $100-300 just by working on these items ourselves.
Two projects and two women. Seems like a balanced equation, eh?
We decided to start with the fascinator. It's smaller and obviously the easier project. Right? Here are some pictures of the beginning of our night, which started about 7 PM. Notice the fresh smiles. Can you see the joy and lightness in us? There's anticipation with what's to come and a "we can do this" air about us.


We started with a simple comb. It sparkled with crystals, but didn't have too much to offer beyond that. I'd bought lace, feathers and more crystals with which to embellish the comb. Our tools were spread before us and we began our preliminary exam. We cut lace, folded it and twisted it into different positions. We threaded it through crystals and let it just serve as a backdrop. We arranged feathers, hid feather stems and fluffed them as best we could. We tried lace alone, feathers alone and then put them together. We did this for over an hour. When we were done with our preliminary assessment, we concluded that we'd move on to the veil and that we'd have to come back to the fascinator. The comb is still lying unglued, unaltered and in its original state on the table. DIY Project 1, Two Women zero.


The veil. It was worn by my mom in her wedding almost 40 years ago. In it's original state it was about 15 feet long. It's the perfect shade for my gown. No longer white, the veil pairs nicely with my ivory gown. The first problem: Towards the top of the veil there were some snags and holes. It needed to be cut and reattached to the comb so that an unblemished part of the veil could be used. The second problem: It was too plain. Crystal embellishments needed to be added to the edges of the newly cut veil in order to make the it sparkle more and match the embellishments on my dress. Essentially, we were taking a 15 foot long veil and making it a two foot long veil with added personality.
 We started work on the veil at about 9:30. We measured, cut and resewed the veil onto the original comb. This part of the process took about 45 minutes. As I was sewing the veil onto the comb, I recall telling mom that perhaps this was a project that should have been outsourced. We hadn't even started adding embellishments and we had already been working on it just under an hour. Next came the personality. Tiny beads and crystals longed to married to the veil.
Mom and I decided we'd go with glue rather than sew the beads and crystals. About 10 minutes in, my finger tips were sticky with semi-dried glue and I was having more luck sticking the embellishments to myself rather than the veil. Glue dots were on the surface all around me and only about 12 beads were actually sticking to the veil. I looked up from the veil at mom and she laughed. She knew the "what the heck are we doing?" look in my eyes. So, we changed course. Mom discovered that the glue pen I was using had a handy suction cup on the back that would pick up the beads and place them into the glue. It was a small miracle and a really ingenious concept. No more sticky fingers! Then, we also used some tweezers to place smaller beads into the glue. We were really rolling then...
This delicate placement and replacement of beads and crystals went for another TWO hours. At 12:30 AM, we'd finished the first round of embellishments. At this point, I still want to do another round of crystals, but at 12:30 AM we decided that round 2 could happen at a later date. We were at a good stopping point and still had hair on our heads, so we called it "paused" for the time being. DIY Project 1, Two Women 1.

In summary, I've learned that not all projects are worth the endeavors in hopes of pocketing some money. I've yet to decide what to do about my fascinator. It may not make it to that stage. The comb may remain a comb. And it would be the prettiest comb I ever laid eyes on.
Questions are always swimming in my head: What do I need to follow up on? To whom do I owe a call or email? What appointment is next? Where's the receipt for that? Do I owe anyone money, my signature or my first child? Who still hasn't RSVP'ed?
I'll be the first to admit that thus far the planning hasn't been that stressful. God has been either a) Merciful or b) Equipped me with the attitude that "eh.. it'll fall into place". Perhaps it's a little bit of both.
I've definitely learned to pick my battles and also prioritize. One area those necessary skills come into play is regarding those lovely "Do It Yourself" aka DIY projects. I think anyone who has planned an event has run into his/her fair share of DIY projects, but what I've found with weddings is that DIY projects can save you HUGE bucks. What is it about the wedding industry that the moment you say you're going to need something for a wedding dollar signs start lighting up in neon and alarms go off? Also, prices automatically jump 25-50% of what they would be for the same piece of paper NOT featured in a wedding. Thats all to say that some projects made from scratch can really save some cash.
Mike and I have already done some DIY projects together (and look, folks, we survived and are still getting married!). When it came to our invitations we decided to design them ourselves and get them printed at Kinkos. It saved us about $100-150 going that route. Also, we're designing and assembling our own centerpieces and ceremony programs. These projects aren't yet done, so here's hoping we're still having a wedding in three weeks.
DIY projects are a fantastic way to save money, but I also learned last night that one should always listen to that little voice that says, "hey, you've got some skills, but maybe you should outsource this one." Cuz that voice wasn't talking to me anymore at 12:30 this morning. It was just laughing at me.
Mom and I decided that we would create my fascinator and also use her existing, super long and plain veil to make a shorter, more embellished veil. The average store-bought fascinator runs about $75-$200. Veils start at about $50 and can run you into bankruptcy. Our thinking was that I could save minimally anywhere from $100-300 just by working on these items ourselves.
Two projects and two women. Seems like a balanced equation, eh?
We decided to start with the fascinator. It's smaller and obviously the easier project. Right? Here are some pictures of the beginning of our night, which started about 7 PM. Notice the fresh smiles. Can you see the joy and lightness in us? There's anticipation with what's to come and a "we can do this" air about us.


We started with a simple comb. It sparkled with crystals, but didn't have too much to offer beyond that. I'd bought lace, feathers and more crystals with which to embellish the comb. Our tools were spread before us and we began our preliminary exam. We cut lace, folded it and twisted it into different positions. We threaded it through crystals and let it just serve as a backdrop. We arranged feathers, hid feather stems and fluffed them as best we could. We tried lace alone, feathers alone and then put them together. We did this for over an hour. When we were done with our preliminary assessment, we concluded that we'd move on to the veil and that we'd have to come back to the fascinator. The comb is still lying unglued, unaltered and in its original state on the table. DIY Project 1, Two Women zero.


The veil. It was worn by my mom in her wedding almost 40 years ago. In it's original state it was about 15 feet long. It's the perfect shade for my gown. No longer white, the veil pairs nicely with my ivory gown. The first problem: Towards the top of the veil there were some snags and holes. It needed to be cut and reattached to the comb so that an unblemished part of the veil could be used. The second problem: It was too plain. Crystal embellishments needed to be added to the edges of the newly cut veil in order to make the it sparkle more and match the embellishments on my dress. Essentially, we were taking a 15 foot long veil and making it a two foot long veil with added personality.

Mom and I decided we'd go with glue rather than sew the beads and crystals. About 10 minutes in, my finger tips were sticky with semi-dried glue and I was having more luck sticking the embellishments to myself rather than the veil. Glue dots were on the surface all around me and only about 12 beads were actually sticking to the veil. I looked up from the veil at mom and she laughed. She knew the "what the heck are we doing?" look in my eyes. So, we changed course. Mom discovered that the glue pen I was using had a handy suction cup on the back that would pick up the beads and place them into the glue. It was a small miracle and a really ingenious concept. No more sticky fingers! Then, we also used some tweezers to place smaller beads into the glue. We were really rolling then...
This delicate placement and replacement of beads and crystals went for another TWO hours. At 12:30 AM, we'd finished the first round of embellishments. At this point, I still want to do another round of crystals, but at 12:30 AM we decided that round 2 could happen at a later date. We were at a good stopping point and still had hair on our heads, so we called it "paused" for the time being. DIY Project 1, Two Women 1.
Below is a picture of the veil after we cut and resewed it.
I forgot to take a picture after the embellishments were added.
I forgot to take a picture after the embellishments were added.

In summary, I've learned that not all projects are worth the endeavors in hopes of pocketing some money. I've yet to decide what to do about my fascinator. It may not make it to that stage. The comb may remain a comb. And it would be the prettiest comb I ever laid eyes on.
Subscribe to:
Posts (Atom)